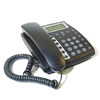
Sipura SPA-841 VoIP settings & configuration Guide

The Sipura SPA-841 IP telephone can be configured as a two (2) line or, via a simple software upgrade, a four (4) line full featured business phone with pixel based graphical display, speakerphone and headset port. Stylish and functional in design, the SPA-841 can be used in residential, SOHO, enterprise and small to medium business service offerings including IP PBX, hosted IP telephony and IP Centrex.
STEP 1
You must first determine what IP address it received.
To do this, on the phone dial pad, press the “I” button. Using the Up/Down Scroll buttons navigate to “Network” and press the left Soft Key labeled “Select”. The IP address of the phone will be displayed in the “CurrentIP” field. Write the IP address down for future reference.
STEP 2
Go to any browser equipped computer on your network and enter the address: https://<IP ADDRESS>/ where <IP ADDRESS> is replaced by the address that was given to you in STEP 1.
STEP 3
Click on the "Admin Login" button near the top right side of the screen, then click on the "Ext 1" tab.

STEP 4
You need to modify only a few parameters from the factory default. They are listed here:
Proxy: sip3.voipvoip.com
Display Name: Enter your full name, this will show up as part of your caller ID.
User ID: Enter the account number assigned to you when signed up for VoIPVoIP service.
Password: Enter the same password used to login to your VoIPVoIP account

STEP 5
Change the “Preferred Codec”to G729a. Also change the “Use Pref Codec Only” to No.

STEP 6
Click on the "Submit All Changes" button at the bottom of the form.
STEP 7
Make Calls!
Problems? If you get one-way audio, or cannot get a dial tone or cannot make/receive calls with your VoIP device, you are probably behind firewall. Your router's firewall (also known as NAT) is blocking certain operations of the VoIP telephone adapter or some of the settings of the adapter is not entered correctly.
If you are sure that your account number & password is entered correctly to your device, before trying to resolve this issue on your router or voip device, you can get all device settings (other than account number and password) remotely from our servers.
In order to receive configurations remotely go to VOICE/ ADVANCED and find PROVISIONING tab and change the field below:
- Profile Rule: https://config.voipvoip.com/$PN
Click on the "Submit All Changes" button at the bottom of the form. Unplug your device from the power and plug back after 5 seconds to reboot the device. Device will now get settings remotely from our servers.
Test again to make and receive calls.
Still Problems? Please check our VoIP device troubleshooter
NAT/Firewall Issues
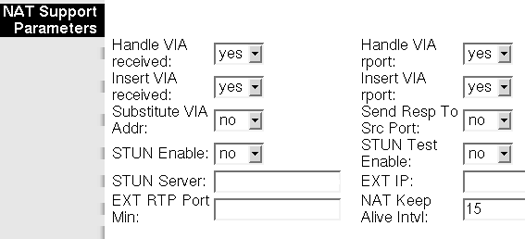
If you get one-way audio, you are probably behind NAT. Make the following changes on EXT 1 (you have to click on advanced view to see these options)

on the SIP menu;

If the phone fails to login, please take the time to double check your configuration as above. If everything appears to be correct, the problem may be your firewall.
